Activate Active Directory Recycle Bin on Windows Server: Step-by-Step Guide

To empower users to recover deleted Directory objects, aside from restoring them from backup, the Active Directory Recycle Bin serves as a valuable tool for restarting AD Domain Service or rebooting DCs.
Restoring Active Directory is not a straightforward process for administrators who inadvertently delete entire Organizational Units (OUs) or for users seeking a more accessible way to recover from such incidents without resorting to intricate methods.
Jump To...
This underscores the importance of users activating the Active Directory Recycle Bin either during the installation process or when assuming control of the Active Directory environment.
Prerequisites for Activating Active Directory Recycle Bin
The operational level initially needs to be configured to Windows Server 2008 R2. Users have the option to employ either of the two approaches to elevate the functional level. The adprep.exe utility can be utilized to update the active directory schema, eliminating the need for pre-R2 domain controllers before advancing the functional levels.
Once the forest functional level is established as Windows Server 2008 R2, users can enable the Active Directory Recycle Bin feature through the methods outlined below:
1. Employing the Enable-ADOptionalFeature Cmdlet
2. Utilizing Ldp.exe
Activate Recycle Bin Using Activate-ADOptionalFeature Cmdlet
Follow these steps to activate the recycle bin:
- Navigate to the start menu and select the Administrative tools option. Right-click on the Active Directory Module for Windows PowerShell and choose “Run as administrator.”
- Enter the following command in the Active Directory Module for Windows PowerShell Command prompt and press Enter:
Enable-ADOptionalFeature –Identity ‘CN=Recycle Bin Feature,CN=Optional Features,CN=Directory Service,CN=Windows NT,CN=Services,CN=Configuration,DC=www,DC=domain,DC=com’ –Scope ForestOrConfigurationSet –Target ‘www.domain.com’
Activate Recycle Bin Using Ldp.exe
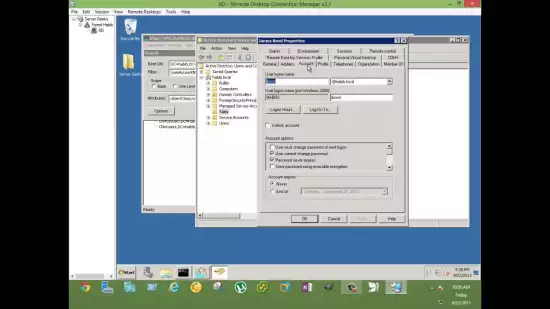
To activate the Recycle Bin using Ldp.exe, follow the steps below:
Open Ldp.exe by clicking on the Start menu, selecting the Run command, and typing “ldp.exe.”
Click on “Connect” to establish a connection and bind to the server hosting the forest root domain of your Active Directory DS environment. Click “Bind” to complete the process.
Select the “View” button, choose “Tree” in BaseDN, and opt for the Configuration Directory partition. Click “OK.”
In the console tree, double-click the distinguished name of the Configuration Directory partition, and navigate to the CN partition container.
Right-click the distinguished name of the CN=Partitions container, and select “Modify.”
Ensure that the DN box is empty. In the “Edit Entry Attribute and Type” section, enable the Optional Feature.
Type the necessary command in the modify dialogue box: [Type the command here].
CN=Partitions,CN=Configuration,DC=mydomain,DC=com:766ddcd8-acd0-445e-f3b9-a7f9b6744f2a.

- Utilize the alternative forest root domain name for your Active Directory Domain Services (AD DS) environment by incorporating “Mydomain” and “com.”
Activate the AD Recycle Bin on Windows Server 2016
To activate the Active Directory Recycle Bin on Windows Server, follow the steps provided below. However, once the AD Recycle Bin is enabled, it cannot be turned off.
The steps are as follows:
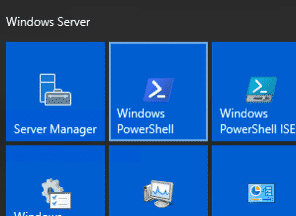
Step 1 - Launch Server Manager
Launch the Server Manager on your Windows system.
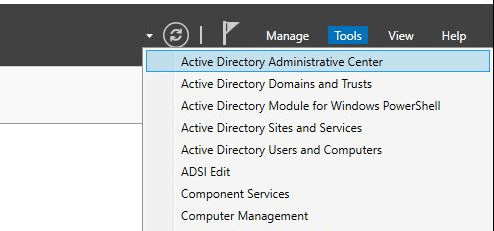
Step 2 - Access the Active Directory Administrative Center
Access the “Tools” section within the Server Manager and proceed to choose the “Active Directory Administrative Center.”
Step 3 - Activate the Recycle Bin
Navigate to your local domain within the Active Directory Administrative Center, and then click on the option for “Enable Recycle Bin.”
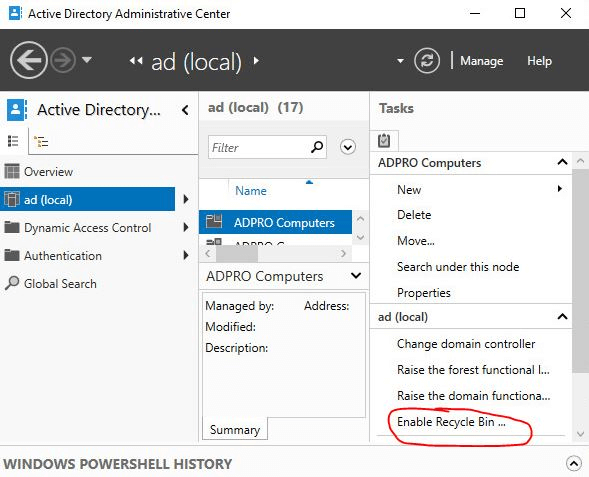
To verify, select “OK” and once more press “OK” for the following pop-up.
Your Active Directory recycle bin is now activated.
Activating the Recycle Bin using ADAC (Active Directory Administrative Center)
The Active Directory Recycle Bin doesn’t come pre-enabled in a system; it necessitates manual configuration by an administrator running Windows Server 2008 R2 or later DCs in the forest. Activating the Recycle Bin isn’t overly complicated, but it does require careful oversight.
Initiate the Active Directory Administrative Center and pick your domain.
Choose “Enable Recycle Bin” from the task menu. Alternatively, you can right-click your domain name and opt for “Enable Recycle Bin” from the drop-down menu.
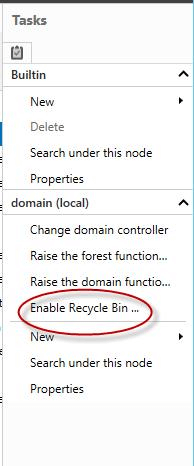
Following the initial step, proceed to the subsequent one. A pop-up window will appear, prompting you to confirm. It’s crucial to note that once the recycle bin is enabled, this action cannot be undone.
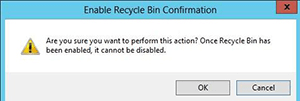
The activation process may take some time to complete, contingent upon the size of the Active Directory infrastructure.
Upon enabling the Active Directory Recycle Bin, all previously deleted objects, predating the activation, will transform into recycled objects and won’t be visible in the “Deleted Objects” container.
It’s important to note that you cannot recover these files using the Active Directory Recycle Bin. However, an alternative approach involves restoring them from a backup of AD DS conducted before enabling the Active Directory Recycle Bin.
States of Active Directory Object
When a user deletes an object, it typically goes through two states within the Active Directory:
1. Deleted State
Prior to the deletion process, the object retains all of its links, attributes, and group memberships within the partition’s container for deleted objects. The object will persist in this state for a specific duration known as the deleted object lifetime. Once this timeframe elapses, the object will automatically transition to the recycled state. Restoration of the object is possible, complete with its original attributes, group memberships, and links.

2. Recycled State
Attributes crucial for replicating the updated state of the object to other Domain Controllers (DCs) in the forest are preserved when a deleted object is transitioned to the recycled state.
Activate the Recycle Bin in the Active Directory Administrative Center
To activate the Recycle Bin in the AD Administrative Center, you require a user account with domain admin privileges. Open the AD Administrative Center by
start->run->dsac.exe
Choose your domain name and then in the “task” pane, select “Enable Recycle Bin.”
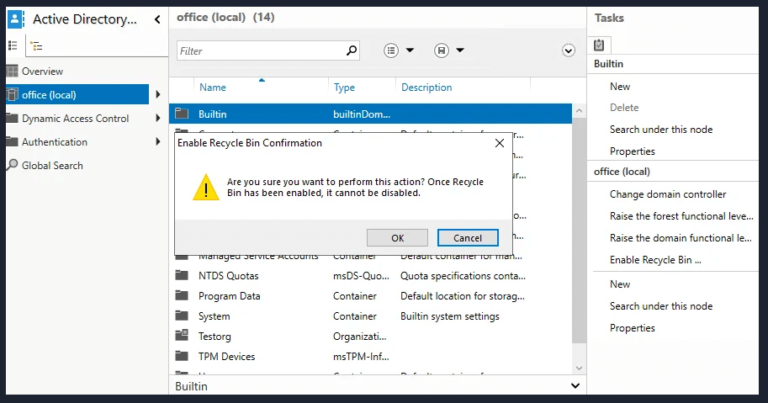
As an alternative, within the overview, perform a right-click on your domain, and subsequently, select the option “Activate Recycle Bin.”
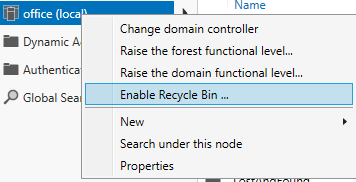
A confirmation message will appear in a new window, indicating that the recycle bin feature can only be enabled once. If you concur, click “OK.”
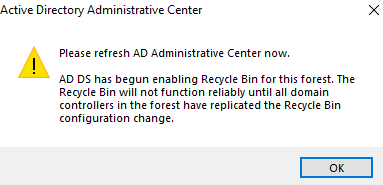
Refresh the ADAC window by selecting the refresh icon in the top right corner of the window and confirming by clicking “OK” in the warning prompt.
A fresh container named “Deleted Objects” will now be visible in the window, situated beneath the container labeled “computers.”

How to Activate Recycle Bin in PowerShell Console?
Through the PowerShell console, the Recycle Bin can be activated. Simply execute the following command with elevated permissions and input the provided code:
PowerShell.exe Import-Module ActiveDirectory Enable-ADOptionalFeature -Identity "CN=Recycle Bin Feature,CN=Optional Features,CN=Directory Service,CN=Windows NT,CN=Services,CN=Configuration,DC=office,DC=local" -Scope ForestOrConfigurationSet –Target "office.local"
Substitute “Office,” “Local,” and “office.local” with your specific domain parameters. Upon executing the command, the system will prompt for confirmation. If you wish to proceed, type “Y,” and a new container named “Deleted Objects” will emerge.
Once an AD object is deleted, its “isDeleted” attribute becomes “true,” and the “isRecycled” attribute is no longer intact. The object will then transition to the “Deleted Objects” container. From here, you can efficiently restore the object to its recycled state by right-clicking, selecting “Restore,” and confirming the action.
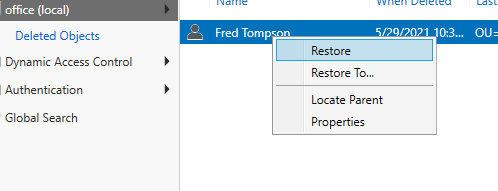
After 60 days, the recycling lifetime will expire, and the “isRecycled” parameter will change to “true.” At this point, the recycled object will undergo permanent deletion from the Active Directory.
How to verify if the Active Directory Recycle Bin is activated?
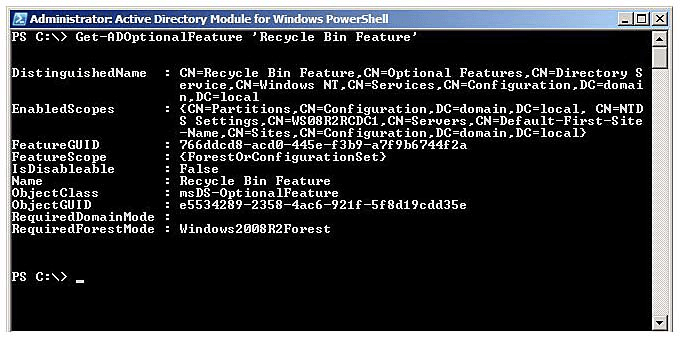
To check if the recycle bin feature is enabled or not, enter the following command and press “Enter”
Get-ADOptionalFeature -filter *

You must verify that the scope is activated. If the scope is not enabled, it will be devoid of any content.
How to Restore Objects Using the Active Directory Recycle Bin?
To restore an object from the recycle bin, navigate to the Active Directory Administrative Center and select the “deleted objects” folder. Within this folder, you can peruse the list of deleted objects to locate the specific object state you intend to restore.
What are the Pros and Cons of Utilizing the Active Directory Recycle Bin?
Benefits
The benefits of an AD recycle bin encompass various advantages. It reduces the downtime of directory services by allowing you to restore deleted Active Directory objects without resorting to the restoration of Active Directory data from restarting DSRM, backups, or rebooting domain controllers.
Drawbacks
One drawback of the standard Active Directory restore is that it requires execution in DSRM or Directory Service Restore Mode. Furthermore, any modifications made to the objects during the restore and backup process cannot be recovered.
Frequently Asked Questions
Enabling the AD Recycle Bin is an irreversible process. Once the user has activated the AD Recycle Bin, it cannot be disabled again.
The Recycle Bin feature retains both link-valued and non-link-valued attributes. This means that when an object is restored, all of its attributes will also retain their settings.
Furthermore, the AD Recycle Bin enables quicker recovery of deleted objects without the necessity of restoring an Active Directory backup.
Enabling the Active Directory Recycle Bin will result in an increase in the size of the Active Directory database (Ntds.dit) file. Therefore, it is crucial to ensure there is sufficient disk space before initiating the recycle bin feature. The ability to swiftly restore deleted objects can save a considerable amount of time, and the process eliminates the need to boot the server into DSRM mode, preventing disruption in handling requests.


