
Easy steps for securing your VPS server's SSH setup
Overview
Imagine you’ve already set up SSH key-based passwordless access to your VPS server, significantly enhancing security compared to traditional password-based methods. While this is a commendable step, there’s always room for additional security measures.
In the modern world, various server-targeted attacks are prevalent, making it crucial to secure your SSH server further. “Hardening” is an IT term associated with reducing the attack surface of your system. This guide will outline a few straightforward methods to harden your SSH server.
Statistics indicate that if a service proves challenging to hack with a generic approach, attackers often move on to easier targets. Whether your VPS serves personal projects, development endeavors, or a personal website, enhancing SSH connection security is a prudent measure to save time and mitigate potential risks in the future.
Requirements
CentOS 7.4 VPS Server
Key-Based SSH Access: If you haven’t set this up yet, you can follow our guide[1] to do so.
Fundamental Skills: Basic proficiency in editing Linux configuration files and manipulating services is required for the following steps.
Modify the default SSH port
By default, the SSH service listens on port 22. Altering the default port can mitigate potential attacks, as attackers not only need to target your server with automated software but also discover the port your SSH service is using.
Ports from 0 to 1023 are reserved for well-known ports, 1024 to 49151 are registered ports, and 49152 to 65535 are dynamic/private/testing ports. It’s advisable to choose a port either from the 1024 to 49151 range or the 49152 to 65535 range. While you can technically choose any port, to avoid potential problems, selecting from the 49152 to 65535 range is a prudent choice. Let’s choose 49513 as an example.
Check if someone has already changed the port; it’s possible if you’ve accessed your VPS using the standard 22 port.
cat /etc/ssh/sshd_config |grep Port
As you can see, the port string is currently commented. Let’s modify it by uncommenting the string and changing the port to 49513.

As a precaution, check that this port is not used by any other software by running:
ss -tulpn | grep LISTEN
Restart the SSH service.
systemctl restart sshd
Check the status of the service to ensure it restarted successfully. Additionally, confirm that your SSHD service is now listening on the new port.
systemctl status sshd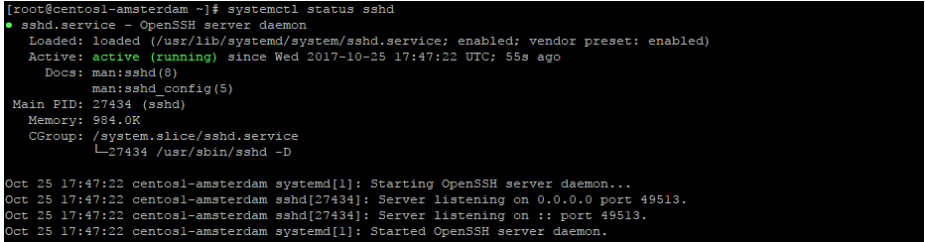
Caution! Your current SSH session will not be dropped immediately, but the next time you connect, you will need to use the new port.
Disabling the v1 Protocol
Disable SSH Protocol v1 for Enhanced Security
SSH supports two versions of protocols: 1 and 2.
Protocol version 1 is known to be less secure and has numerous vulnerabilities. To enhance security, let’s enforce SSH to use only Protocol version 2. Open the file /etc/ssh/sshd_config and add the following line:
Protocol 2
Restart the SSHD service and check its status.
systemctl restart sshd
systemctl status sshd
Securing Access by Disabling Root Login
Enhancing Security: Disabling Root Login and Adding a Specific User for Server Access
By default, a VPS server comes with a root user, allowing you to log in with root permissions. However, for improved security, it is advisable to create a dedicated user for SSH access. Once you’ve accessed the system with this specific user, you can then switch to the root user if necessary. Let’s proceed by creating a new user and setting up a password.
adduser vpsuser
passwd vpsuser
Ensure that you have properly set up your server to disable password-based SSH access. Now, let’s populate the authorized keys for the new user with a list of trusted keys, which you previously had for the root user and copied to the newly created user.
mkdir -p /home/vpsuser/.ssh
cat /root/.ssh/authorized_keys > /home/vpsuser/.ssh/authorized_keys
chmod 0600 /home/vpsuser/.ssh
chmod 0600 /home/vpsuser/.ssh/authorized_keys
chown -R vpsuser:vpsuser /home/vpsuser/.ssh
You can also follow the key creation tutorial from this guide[2] and replicate the process for your new user.
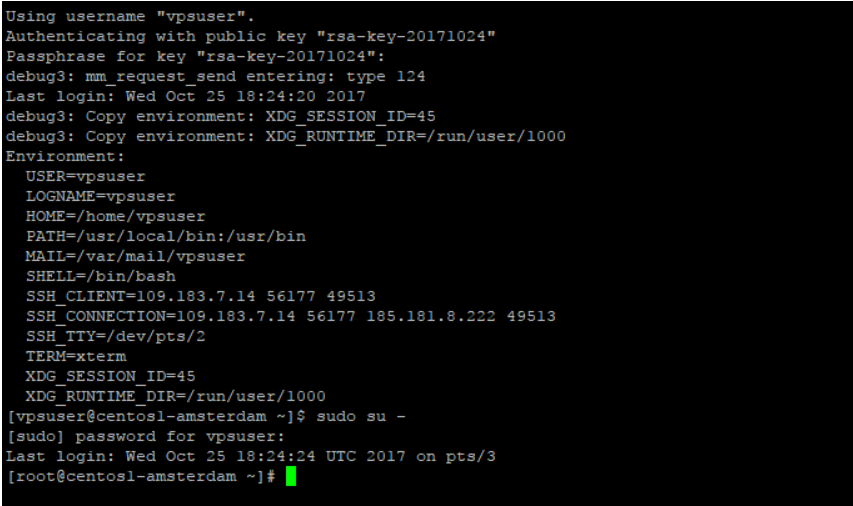
Now, attempt to access your machine using that user and a key that you previously added for the root user. With this non-privileged user, set up sudo access. By default, sudo is configured to allow password-protected sudo access for users in the wheel group. Add your user to the wheel group.
usermod -a -G wheel vpsuser
Now, log in again as the vpsuser (required to reread groups) and try running:
sudo su -
After entering the password, you should be granted access to log in as the root user.
Now, you can disable root login for your VPS server. Open /etc/ssh/sshd_config, uncomment the #PermitRootLogin yes string, and change it to PermitRootLogin no.
Restart the SSHD service. IMPORTANT: Carefully verify that you can access the VPS with your user, and ensure that sudo works, before proceeding to disable root login and restarting sshd.
systemctl restart sshd
Be aware that you will immediately lose the session and will need to re-login with the user you created, who has key-based SSH access and sudo privileges.
Set a user limit
Limit the Number of Users Accessing Your Server:
In scenarios where you have various unprivileged and privileged users on your machine, it’s often crucial to ensure that only a specific number of users can access your server. For instance, let’s consider a scenario where you’ve decided that only the vpsuser we created earlier should have SSH access to our VPS. To enforce this, open /etc/ssh/sshd_config and add the AllowUsers vpsuser string to the configuration file.

AllowUsers vpsuser vpsuser1 vpsuser2
You can also restrict access to a specific group by using
AllowGroups group1 group2
Restart the SSH service and verify that it is running correctly.
systemctl restart sshd
systemctl status sshd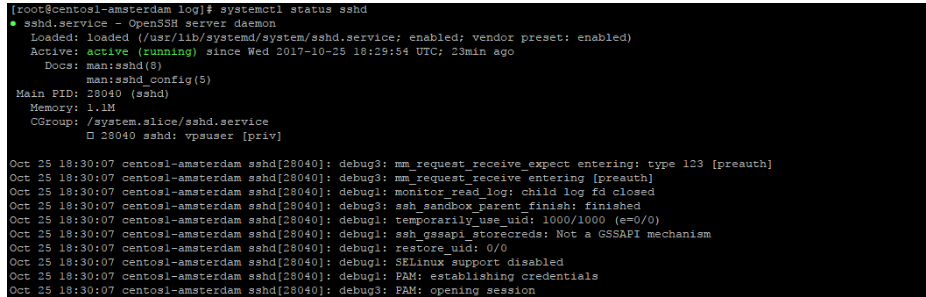
In Summary
We’ve completed several quick and easy steps that make minimal changes to your VPS behavior but significantly enhance your setup’s security. It’s always recommended to secure your SSH access to prevent potential security breaches. This way, your VPS server is less susceptible to hacking attempts by individuals using generic hacking software.
[1]: https://www.blendhosting.com/kb/setting-up-a-safe-ssh/
[2]: https://www.blendhosting.com/kb/setting-up-a-safe-ssh/